
A garbage disposal is a great tool to have in the kitchen! In fact, they can help keep our pipes clear, prevent kitchen odors, and reduce the amount of food waste you are throwing out. If you have never had one, or if you need to replace an older one when the motor dies out, then it’s time to shop.
Is a garbage disposal your next DIY project?
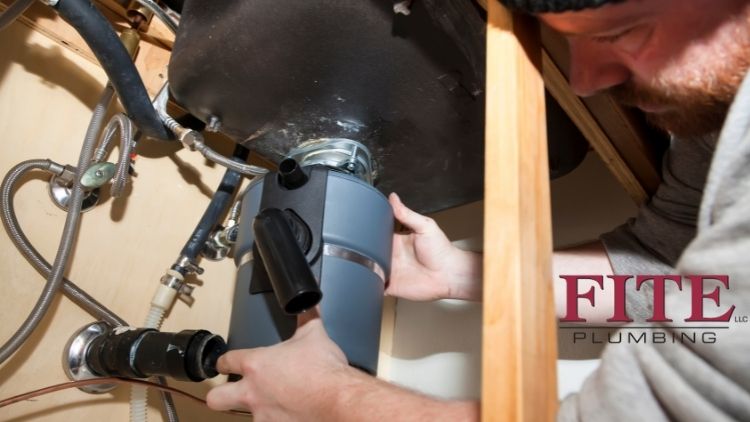
Once you decide you need one, and you make your purchase, it is time to install it! This is a project you can do yourself in about 3 hours with a moderate skill level. Read the instructions first, then decide if it’s in your DIY capabilities. If not, our plumbing pros can install it for you. Another key point: you can even save 10% if you book an appointment online! Anyway, here are the basic steps.
- First, place a bucket underneath the P-Trap to catch any waste or sludge that may have built up in the pipes. Keep a towel handy in case of spills.
- Disconnect the P-Trap from the drain’s tail pipe with a wrench.
- Cut the P-Trap with a hack saw near where it exits the cabinet. (Probably from the side or the back of the cabinet.)
- Reach underneath and disconnect the sink stopper to the tail pipe from the sink with a wrench.
- Clean away any old plumber’s putty from on top of the sink.
- Apply fresh plumber’s putty to the bottom of the new sink flange and place it into the drain hole.
- From underneath, secure the new sink flange to the cabinet counter with 3 screws and a screw driver. Some newer models have plastic hand tightening screws.
- The hose to the dishwasher needs to drain into the garbage disposal. For this reason, most disposal models come with a hole that you can punch out to do this.
- There should be a mounting ring attached to the sink flange where you can attach the disposal and hand tighten it.
- Reconnect the P-Trap to the side of the disposal. It’s important to realize you may need to add additional pipe pieces to make the connection.
- Seal all the connections for the new P-Trap with plumber’s putty.
- Open the faucet and check for any leaking.
- Plug in the disposal to its outlet or contact an electrician to wire it to power.
- Last, test out the disposal!
Are you ready?
Installing a garbage disposal is not a technically difficult task. It’s easy if you have the right tools and supplies and have an idea of what you are doing. Use these steps to help you with your garbage disposal DIY. Better yet, leave it to the professionals and give us a call at Fite Plumbing at (317) 271-5400 or book an appointment online and save 10% We’re here to serve!
Are you on Facebook? We are, too. Let’s be friends!